Want to share this Post from CSJunkies. . . . as some of you guys aren't able to view the pictures.. . . . .
and i think a lot of you guys will own this kit very soon

credit goes to CSJunkies

Finally got the time to compile a little something about countersteering an OTA-R31.
Well here goes.. (Warning, 31 pictures)
Things that you need to prepare other than the OTA-R31 kit:
1. TA05 Front 1 way
Don’t worry, it fits.. you just need to center the pulley so that it lines up to the center pulley. (I’ll show you how below).
But if your style is using balldiff, you have to use the plastic balldiff included in the kit
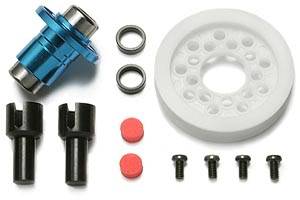
2. TA05 Front Spool

Same with front 1 way, it’ll fit for the rear, you just gotta center the pulley so it lines up to the rear center pulley.
But if your style is using balldiff/locked balldiff, you have to use the plastic balldiff included in the kit
3. Tamiya Aluminum Spacer Set

You need these to center the diff pulleys. You can use other brand as long as they’re spacers
4. TRF416 Rear Belt

If you need a shorter belt for front and rear, use this. Stock OTA R31 comes with 180(60t) belt. This one is 174(58t)
5. TRF 416X Rear Belt
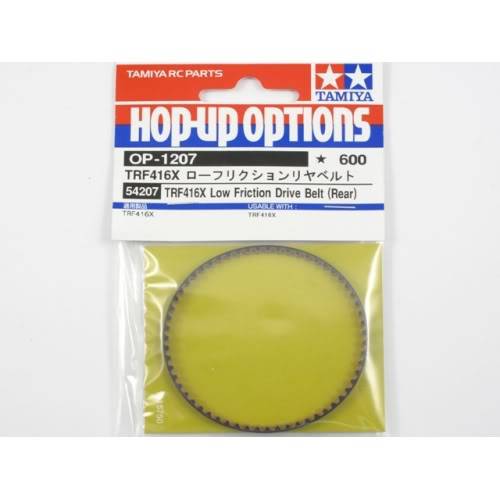
If you need a belt in between the stock OTA R31 belt and the TRF416 belt. Use this. This one is 177(59t)
I’m sure theres a lot more sizes of short belt but these two are maybe the easiest to find
6. Streetjam OTA R31 Pulley Strenghtening

OTA-R31 comes with plastic C-pin for center pulleys (just like Stock MR4TC for its center shaft cup). If you’re planning to use powerful motor, use the pulley strengthening kit. It contains 4 metal pins + 4 O-Ring to lock the metal pins into place for those 4 center pulleys.
Of course you can source this part yourself. If you can, it’ll be a bit cheaper than buying this part.
7. Streetjam OTA R31 countersteer kit
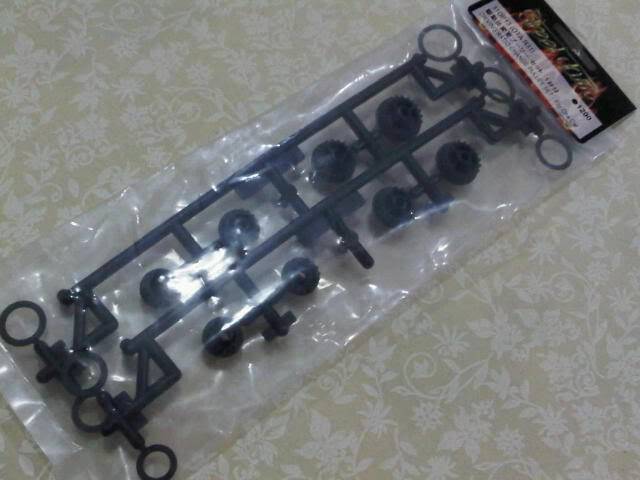
This is what I like about the CS kit. It looks stealth on any OTA-R31.
It comes with 8 different center pulley sizes.
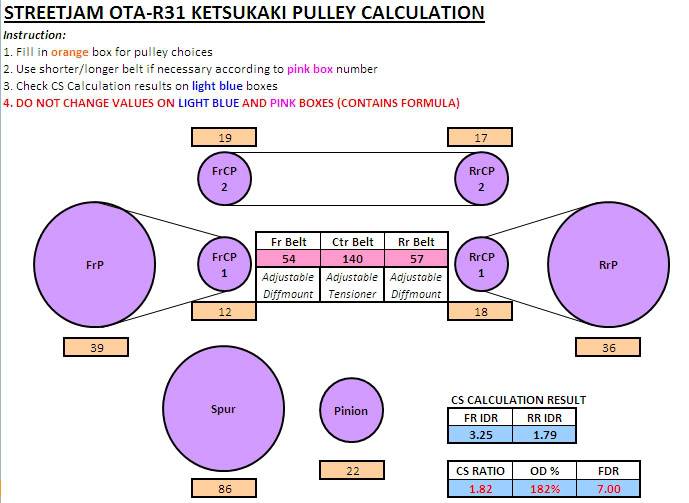
14t, 15t, 16t, 17t, 19t, 20t, 21t, 22t. So you can combine those 4 center pulleys with whatever CS ratio you want/need.
Keep in mind that OTA-R31 comes with 4 18t center pulleys.
Okay.. I think those are the parts you need to make a very competitive OTA-R31
Now lets move on to some pointers I compiled based on my experience and testing.

Here’s a couple of the pulleys I assembled. I only used the 19t and 17t from the CS kit for center belt.
I use stock center belt.
Next, preparing the front one-way and the spool for the rear.
I only took pictures of the spool, cuz I got too serious and forgot to take pics of the front one-way..
But basically, how you do it is exactly the same, you will only need longer screws. 2mm longer than the included screw is enough
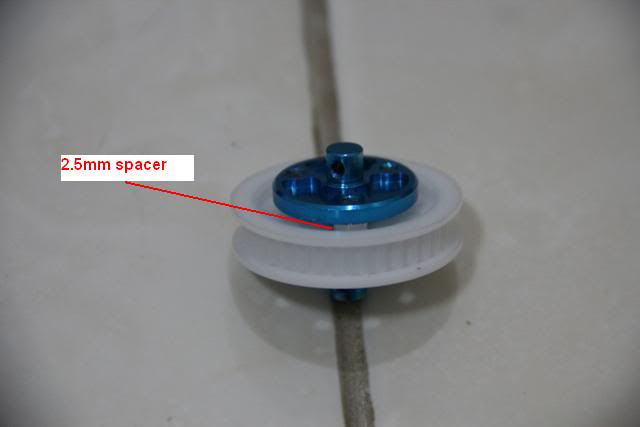
Notice the red line it pointed to. That’s the spacer I use to set the pulley right in the middle.

Because I use 8mm screws, I also need to install 1.5mm spacers on the other side to make the screw flush to the pulley holder.

Here is what I’m talking about. The pulley sits right in the middle of the spool. This is because the center pulley construction that lines up right in the middle for OTA-R31. I use TA05 36t for this rear spool pulley.
Btw, don’t forget to put threadlock on the screws.

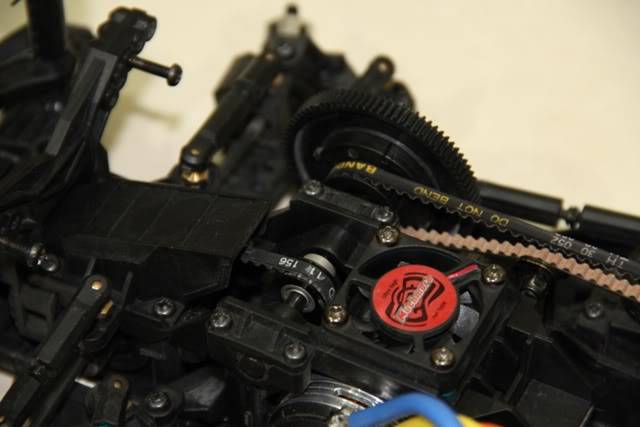
I also found that sometimes, the center belt slips out from the tensioner, that’s why I installed this wheel hub spacer as a tensioner guide so that the center belt stays on the tensioner.
Remember that pulley strengthening kit above? Here’s the picture. Look at where the red line points to.
The stock center pulley locker is made from plastic, because I use 7.5t Keyence BL set, I want my center pulleys to be strong. That’s why I use metal pin instead of the plastic pin that came with the kit.
For this front side center pulley, I use 19T

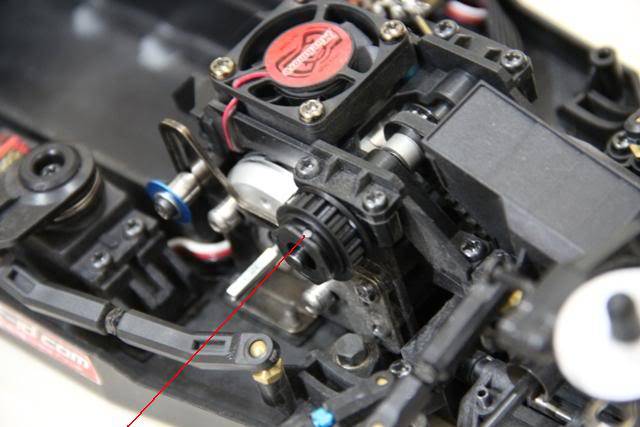
Check out the spur holder. In stock form, there is supposed to be a plastic pin where I drew the red line.
I simply cut it. Cuz I use the metal pin to lock the center pulley in place.

Here is the spur holder installed. It snaps right into the center pulley.
You can see the center pulley is installed with that tensioner guide I just added. The spur size out of the box is 86t, 48dp.

Same thing I did for the rear pulleys. I use 17t for the rear side center pulley, and the stock 18t for the rear center pulley. Notice the rubber o-ring? That came with the center pulley strengthening kit from the parts list above. I ditched the weak plastic pinlock
As for the front center pulley, I use square aluminum 12T. I did this because I don’t wanna change spur size with a bigger one. That way, I can maintain rear FDR @7.0 with this 12t / 39t underdrive.
Again, don’t forget to put threadlock on the locking screw for this 12t aluminum center pulley. Line up the screw to the pinhole at the front center shaft.
Now, lets go over the steering. If you decide to use the 4 degrees caster C-Hub for this kit, you wont have problems with steering lock. You will get that 50 degrees lock.
BUT, if you are like me, and using the 7 degrees caster C-Hub that also came with the kit, you will have to do the following to get that 50 degrees lock + no ackerman angle.
First, get some used TA05 plastic bulkhead. You should be able to acquire one free. There are so many SP & OTA-R out there that ditched the plastic bulkhead.
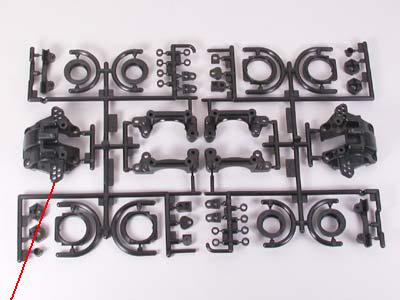
Cut out the part pointed by the red line. You need that so you have the adjustability to set the ackerman angle. Of course you can use other materials, its up to you. But using this 5 hole TA05 bulkhead can ease up the process of finding the right ackerman angle.

Check this out. This is how it looks like when installed to the knuckle.

After that, you will have to cut down that steering stopper @ the bulkhead. See where that redline points to.
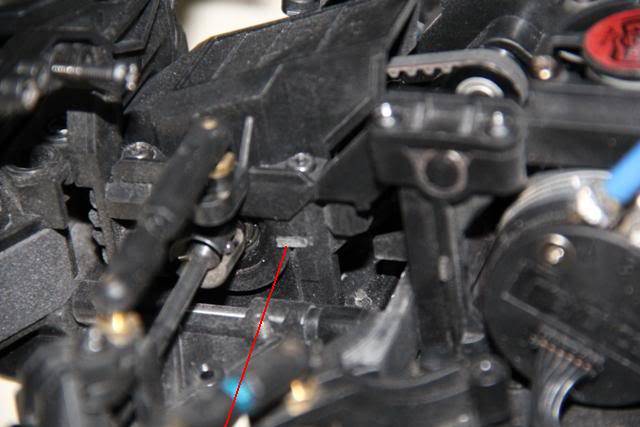
Here is the picture of that steering stopper. I cut it and its gone. That way, the steering crank has that extra 2milimeter of lock.

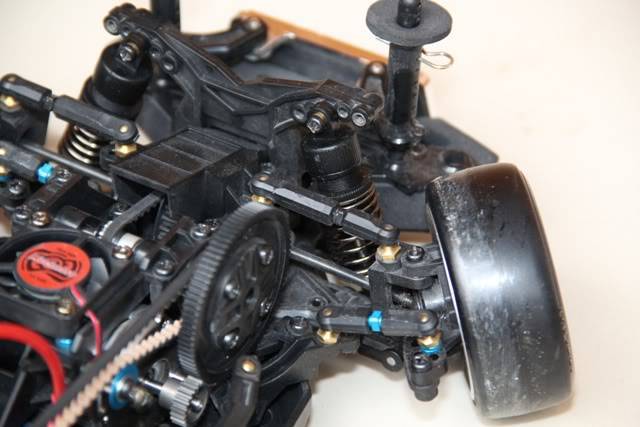
Here’s the top view of the steering system.

With this setup, you’ll achieve this much steering lock. However, in this picture, I decreased the steering EPA so that my dogbone can last a long time.
OTA-R31 is a very stable kit. But this is where I start off with the shock position.
Front shock position

Rear shock position
And that’s about it guys.
Have fun modding & drifting it.
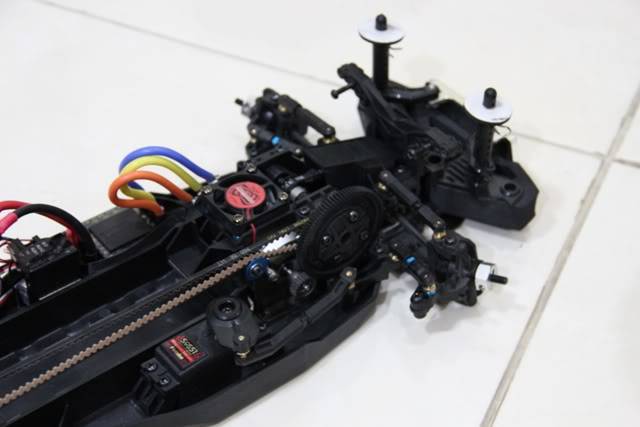
Just some more snapshots of my OTA-R31


 by
by  Calendar


